Our Guide to Growing Microgreens Indoors. Microgreens are one of the easiest and fastest-growing crops, and they offer a wide variety of fresh flavors, from mild to spicy.
They’re also perfect for repeated plantings so you always have a supply of fresh greens on hand. Here’s how to grow microgreens indoors.
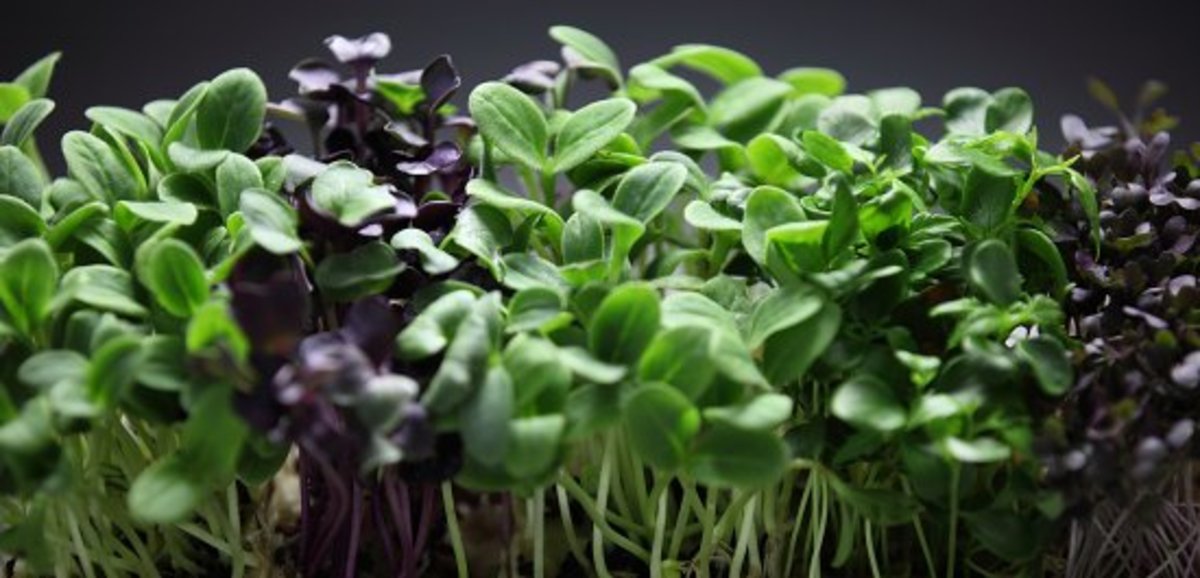
These delicate microgreen seedlings are harvested at a young stage and are ideal for a windowsill garden. After only two to three weeks of growth, their stems can be snipped for harvest. If left to grow, microgreens become young seedlings and then full-fledged plants.
To grow microgreens indoors, you’ll need potting mix and bright light. Flavors can range from intense (like a full-grown plant) to subtle.
Table of Contents
Instructions
Dampen Soil
To get started growing microgreens indoors, you need to remoisten the soilless seed-starting mix. This is a sterile medium that is formulated to promote seed development. To do this, sprinkle warm water onto the mixture and blend until it is thoroughly damp.
Fill Containers
Fill each container with premoistened seed-starting mix, using just enough so that the mix is level with the top of the container. There’s no need to pack it into place too tightly—packing the container will lead to drainage issues. Set the container on a watertight drip tray or saucer.
Sprinkle Seeds
To ensure your seeds have the best chance at germination, be sure to sprinkle them evenly over the surface of your seed-starting mix. You’ll want to sow them more thickly than you ordinarily would, leaving at least 1/4 inch of space between each one.
Cover Seeds
Cover the seeds with vermiculite. This mineral-based material helps to regulate the moisture levels around the seeds, keeping them damp but not too wet. Follow instructions for planting depth provided on the seed packet – some seeds should be barely covered while others will need a thicker covering to germinate. Label your plantings so you can keep track of what’s growing where.
Water
Water the seeds you have sown with a light shower, just enough to soak the vermiculite without washing away the seeds. Water lightly as needed to keep the seed-starting mix damp until the seeds germinate and green shoots sprout. If the mix is too wet, seeds can’t root and fail to grow.
Cover
To encourage the best growth of microgreens indoors, cover the containers with a lightweight sheet of plastic or a dome-shaped lid to maintain humidity and promote germination. Set the drip tray on a heat mat designed for seed starting or on a heating pad.
Care for Plants
Once your seeds have germinated, remove the lid and heat source. Set the containers on a sunny windowsill to help your microgreens grow indoors. Keep the planting medium damp by watering from the bottom. Pour water into the tray and allow it to be absorbed into the soilless mix.
Harvest
Hold a section of microgreens with one hand and use the other to snip with scissors. Keep your microgreens cool in an airtight container until you’re ready to use them. They’ll last about a week in the refrigerator.